Certified Signature
Print
Modified on: Fri, Jan 17, 2025 at 7:08 AM
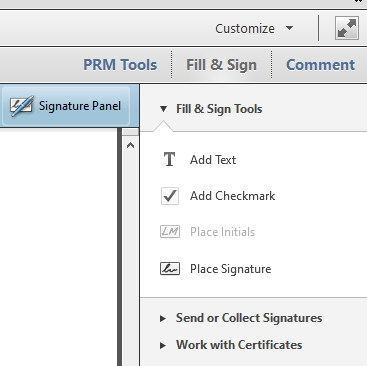
- To create a certified signature in Acrobat you first need to open a PDF file.
- Click on Fill & Sign in the top right corner and then on Place Signature
- Read the pop-up box and create the rectangle for your signature. After creating the rectangle you we see this screen:
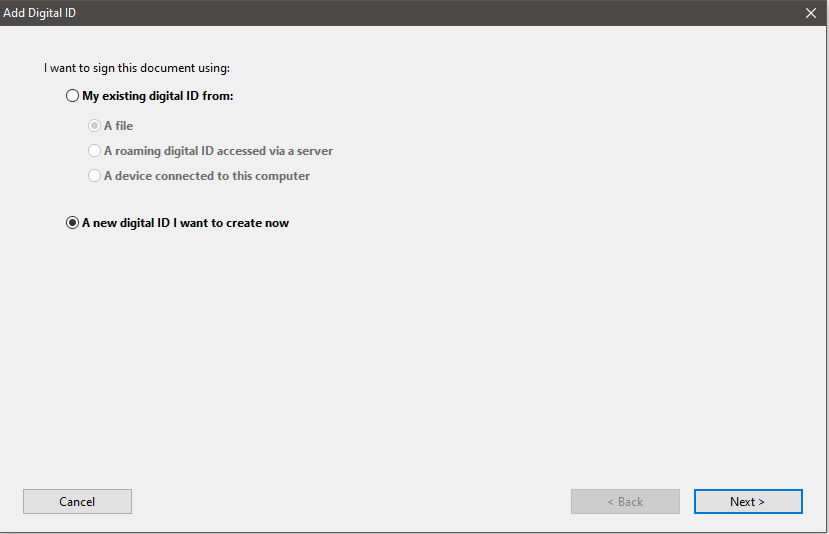
- Make sure that you have a new digital ID selected and click next. On this page select New PKCS#12 and click next.

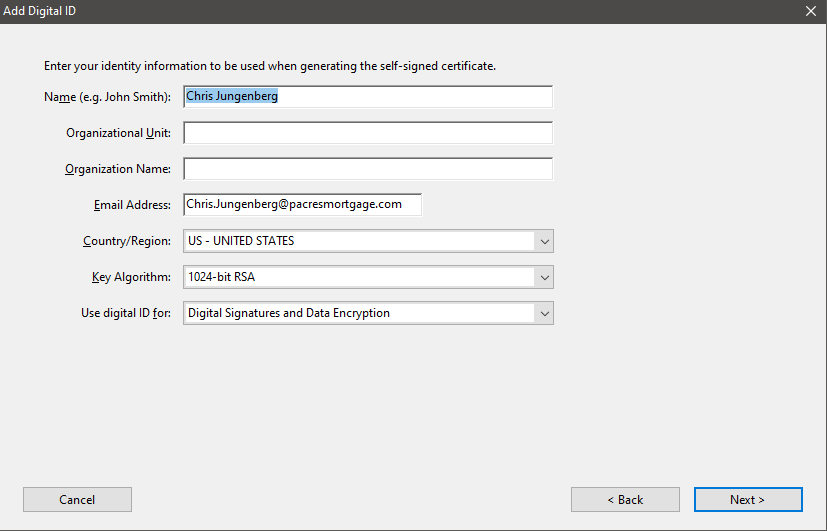
- Fill in your name and email address and click next.
- Set a password. The stronger the better. This will be used when signing documents. Click Finish

- You have now created the certified signature. To use your newly created signature. Click on Fill & Sign and then place signature. Draw the box where you want to sign. The following window will pop-up. Enter the password that you created and click sign.

Did you find it helpful?
Yes
No
Send feedback Sorry we couldn't be helpful. Help us improve this article with your feedback.